|
| Aurora Borealis - Cresswell, Northumberland, UK - 22/1/2012 by Lee Jennings |
A few people have asked me how to photograph the Aurora. I thought I'd write a little blog post about it. I have never done it myself, but I think the process is pretty simple. I've been researching the best ways to go about it because I hope that one day I'll be able to see & photograph this phenomenon myself. All you need is patience, time, crisp clear skies & a long exposure enabled camera. This post is written mainly for UK spotters. Before I start, it is important that you know that the aurora is very, very unpredictable & it is extremely rare in the UK.
So, firstly, you need to check forecasts. Now I know that sounds silly, but with a little bit of research you can find out the likelihood of a CME impact. Without a CME impact, there may not be Aurora strong enough to reach you should you live further south than Northern Scotland.
CMEs, or Coronal Mass Ejections, are the reason behind the Aurora Borealis. In short, the sun releases 'flares' which are made up of solar wind. This wind then travels the 93 million or so miles towards earth (but not exclusively, of course) to then clash with our Earth's magnetic field. The solar wind then reacts with the magnetic field, produced the stunning displays of Aurora seen in the very north or south of the earth. Occasionally, it is possible to see the aurora in the UK. The intensity of the storm can be measured using the K-index. The higher the KP number, the more chance you'll have of seeing Aurora. For example, I am currently near Manchester & I need a KP of around 8 or 9 for the lights to be visible for me. For more information on finding your KP number & finding out about the K-index, check out the links at the end of this post.
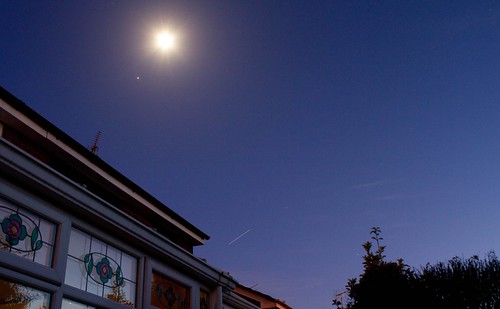
So, when you find that the northern lights might make an appearance in your area, you need to find a spot, away from light pollution, with a clear view of the horizon, facing north. You may find as the storm starts, you will be confined to staring at the northern horizon & you may not even see anything at first. But as the storm gets stronger, you may see full displays overhead. This depends on where you are & the intensity of the storm. As soon as you find the Aurora, get your camera set up. You need a good sturdy tripod & a remote control (or you can use the timer) to avoid shake.
DSLR users: A wide angle lens is best for this, as is a wide aperture. The wider the aperture, the more light your camera will let in. I personally stop down to around f3.5 to f5.6 for star photographs. Take a few test shots of around 1-2 seconds to check composition & focus, make the necessary adjustments & then extend your exposure time to around 10-15 seconds. Your ISO setting should be around 400-1000, depending on how bright your aurora is. If you find that your shots are coming out dark, try extending the time or stepping up the ISO. If they come out too light, do the opposite. Experiment until you find the perfect exposure & snap away.
Point & shoot users: depending on the specifications of your compact camera, while not impossible, it may be more difficult to photograph with a point & shoot. If you can, use the manual controls & play around with the settings before you even set foot outside so that you can be ready. You need a camera capable of ISO400-800, long exposures & digital zoom. Follow the steps above & you may be surprised at what you come out with. And don't forget your tripod!
It is hard for anyone to tell when the northern lights will arrive because it is such a hit & miss event. The best way to go about it is to follow & few people on twitter (my personal recommendations would be @VirtualAstro & @mark_humpage) because they will be able to advise you on what's happening.
Enjoy your hunt for the northern lights. I'm sure it's a wonderful & unforgettable experience!
Links -
K-index & KP numbers
Aurora forecasts & current activity
General information
http://en.wikipedia.org/wiki/Aurora_(astronomy)
http://www.pfrr.alaska.edu/aurora/index.html